-
4th October 2021, 08:46 PM
#1
Getting ready to test
I have worked through the issues mentioned in my previous thread http://www.injectionmoldingonline.com/forum/showthread.php?t=1441
After getting it to clamp down on a block of aluminum I turned on the heaters and let it come up to temperature (~350) in all zones and manually tried screw rotation, carriage movement, etc. As far as I can tell all functions work.
Now I need to try to set it (Trueblood, 30-ton, screw-type) up to run ABS. I'm working slowly because I don't want to damage anything ... including me. I have only ever used a ram-type machine and this is a home shop/small business type environment at my home.
One resource I could use would be an online document that would cover the entire cycle from clamp to done but, especially the sequence of events during the injection cycle. I "assume" something like:
- (in my case) table rotates lower half of mold into place
- clamp closes and maintains clamping pressure
- carriage moves forward to press nozzle against mold.
- screw moves forward without turning to inject the shot
- 'decompress' happens (I read somewhere that this was to reduce pressure on the 'locking ring' of an internal valve)
- screw rotates packing in the plastic for the next shot, as it rotates a given amount of 'back pressure' (resistance against screw moving backwards, away from the mold) and the back pressure is what packs the plastic and promotes shearing to raise the temperature.
- carriage retracts
- clamp opens
- (in my case) Table rotates
- ejector is activated
The screens I have available to set all this up ...
The main screen:
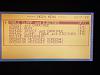
Table, Clamp and Ejectors:
Not all these settings make sense to me but I was able to get it to clamp the mold (block of aluminum)
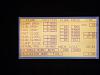
Inject and Carriage:
No idea if the numbers show are from the last time the machine ran (6-8 years ago) or random numbers.
A (small) piece of documentation I have says that "Primary and Secondary set points are for the fill portion of injection"
There is a manual valve setting on the rear of the machine to set the back pressure.
There is a manual valve setting on the front of the machine above the operator's panel to set the "Injection pressure".
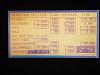
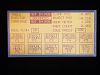
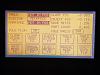
Barrel Heat:

No idea if the numbers show are from the last time the machine ran or random numbers.
These were the settings I used to test the screw (rotated swiftly) and injection rams.
(continued on next post due to limit on pictures per post)
-
4th October 2021, 09:06 PM
#2
Re: Getting ready to test
These are the screens I used to manually activate all the machine functions to see if they worked:
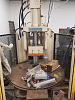
Some pics of the machine:
Clamp and rotary table:
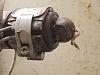
Nozzle:
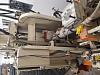
Barrel and rear of clamp/mold area:
(Continued next post)
-
4th October 2021, 09:23 PM
#3
Re: Getting ready to test
Carriage, screw & injection rams:
Attachment 560
Rear of machine:
Attachment 561
BTW: in the pictures of the barrel and screw/carriage the guards have been removed temporarily.
So, my main questions:
1) Do I have the injection sequence correct (first post above)?
2) Website where I can learn about how to do this correctly?
3) Barrel temps for ABS?
4) Suggested settings on "injection screen" for ABS?
5) Back Pressure for ABS?
6) Injection pressure for ABS?
7) How do I start slow on a given mold and increase the shot size, etc. until I have enough (cavity filled) but not too much (straining anything/wasting time/causing excessive ware)
8) Any other info, suggestions, websites, etc. for a newbie?
Again, any guidance much appreciated.
BTW: This is a video of my current ram-type molder making my parts: https://youtu.be/EyxlcS9tGkM
Regards,
Chuck
 Posting Permissions
- You may not post new threads
- You may not post replies
- You may not post attachments
- You may not edit your posts
-
Forum Rules


 Reply With Quote